Quick like a bunny

Quick like a bunny
Gardening

Friday, December 30, 2011

Dried Greens In Mac And Cheese

O.K. Christmas holiday I have been eating to many sweets and some Mac and Cheese. Well this is Kraft's new Cauliflower Mac and cheese. My son loves it and I had to try for myself. Yum. And then I thought, If I am going to eat this bowl I need more nutrition. I crumbled some dried spinach in it.


Still very good. The spinach is not very noticeable besides giving the food a festive look.  I think I need to be buying the Organic Mac and Cheese with the bunny. (update: The organic bunny stuff is organic pasta only. Why have a product half organic? Ug) Try crumbling your dried greens in foods and soups. It works great and helps me get more greens/fiber. I want to try the dried greens in bread, but have not tried yet. Will blog it if I do.

Have a super New year...

Fruit loops Natural Air Freshening Spray Recipe

I have one in every bathroom. It smells better than the Citrus Lysol I was using.

Get a spray bottle. I got a small one at my local store. It was in the travel section of personal care items.

I added about 1/2-3/4 cup of water in the bottle. Then added 40 drops (each) of 100% Lemon, Orange and Grapefruit essential oil. Put the top on and shake. Spray when you want some fresh air in your home, or bathroom area.

It smells like Fruit loops Cereal to me. Those oils mentioned are non phyto/xeno estrogen's. Much better than the unknown chemicals in other air fresheners. These oils are also antiseptic.

My son love to spray his bathroom every time he uses the toilet. My husband likes it to. I am very happy with this simple spray. You could use only one of the essential oils if you prefer.


My spray soap and fresh air spray are a perfect fit for small sink tops and other small places. The bottles are re-usable and there is less waste. Which reminds me, today my husband was telling me that not only do we pay for water we use here in Pflugerville TX. We pay for every every gallon that goes down the toilet and down the sinks, and shower/tubs to and as an added extra cost. Wow. Time to focus on using less water.

Thursday, December 29, 2011

How To Make Coffee With No Machine

How to make a mug of Coffee with out the plastic toxins in coffee makers. This recipe is so simple and it is the old way of making a cup of Jo. An average cup of coffee is considered to be 5 ounces. (Food for thought) Fresh grounds stay fresh for a week and is not recommended to be kept in fridge or freezer. So, grind only enough for about a week. But I do keep my fresh ground in the freezer, in a glass jar for about a week or two. So, it is up to you. I keep my whole beans in the freezer and in a freezer ziplock. A glass jar is recommended because air and moisture can permeate plastic over time, compromising the freshness and flavor. Mental note for myself. Whole beans do not stay fresh forever.

You will need a stainless steel, glass or ceramic kettle or pot to heat water in.
Ceramic or glass mug.
A large Muslin/100% Cotton straining bag or footie sock (un-used by feet)
2 T. Ground Coffee Beans (ground to your liking). Update: 1 T. works to.
Creamer and or milk of choice (optional)
Sweetener of choice (optional)

Start to boil some water in kettle or pot. If using a pot you can add some sort of milk and liquid creamer to. I add it to the mug and microwave it until hot.
Add 2 T. ground Coffee into strainer bag/clean footie sock (I use a 4x6 muslin tea bag).
Put your strainer with coffee in it into the mug. With or with out the hot milks/creamer. When water is almost to a boil, turn off heat and slowly pour it into the inside of the strainer that is in the mug. Fill the mug to you comfort. Now let the it all steep for 4 minutes. When done slowly pull out the  strainer and place it on a small plate to cool off. You can top of your mug with more hot water if you like. Stir, taste, add some sweet if you like. Drink.


It seems like a long process, but it is not. Once you get the habit down it becomes very easy. When the strainer is cool. dump the grains, wash and let dry on towel or hang dry for next day.


I read that drinking more than one cup of coffee can raise estrogen levels very high through a complex equation I do not wish to think about or bore you with. I do not drink coffee, but love a decaf. here and there. I make my husbands coffee and know that his exposure to toxins can cause his harm overtime. I do love to sip this brew I make for him. To know I made it right. It is so yummy.


Monday, December 26, 2011

Corn And Green Beans With Italian Sweet Peppers


This is leftovers from a yummy side I created.

Corn and Green beans with Italian sweet peppers (Serves 2-4 people)

Olive oil
1/4-½-1 Onion diced
2 T.-¼ cup dried crumbled or 1/2-1 cup fresh diced Italian Sweet Peppers. (Or Anaheim Chili Peppers)
1-2 cups of corn
1-2 cups of Green Beans (Cut into bite size pieces and steamed until tender).
Salt
Pepper (optional)
Olive oil
Saute Onion and Peppers in 1-2 T. Olive oil for 5-10 minutes in a large pot or pan. Now add corn, green beans and fold into pot or pan. Add more Olive oil (another 1-2 T. if needed). Salt and Pepper to taste. Heat and stir food until hot. Serve.

If you just want to through your green beans frozen or uncooked in the fry pan. Cover the pot and steam on medium to low for about 10 minutes.

There is a story behind these peppers. A lady I sometimes buy goat whey from had bought sweet pepper seeds and these below grew and turned bright red. She assumed they were hot peppers. Thinking that the garden shop gave her the wrong ones and asked if I wanted the crop. I think she wanted bell peppers to grow. I accepted to harvest these with her.  I took them home to dry and use them for another time. I assumed they were hot/spicy to. I dried them and put them into a jar. I had no idea what kind of peppers they were. I finally made this recipe and thought to add spice. While tasting these as they saute'd I realized they were sweet mild and had a wonderful flavor from the searing in the pan with the Olive oil. I searched the Internet to find out what these peppers were. This is the only pic I could find. This pic shows the right size and the crown like cap on top. Just like the ones I picked and dried.
These peppers are known to be great for frying and sauteing fresh in olive oil. You can broil them and also eat them green or let them turn red which makes them even sweeter. The one pepper that is said to be similar in flavor is the Anaheim Chili Pepper. Great for back up. I want to grow these next year. this was an awesome discovery.

I did nab this pick from the Internet and left the www.chiliplants.com here for my thanks to this wonderful pepper plant pic. Remember Relleno Italian Sweet Peppers for sweet mild meal dishes.


Saturday, December 24, 2011

My New Non Toxic Dehydrator

I am so happy to not have a poly-plastic dehydrator. This was a gift from my hubby for our ten years of tolerance, hee. I mean ten years of marriage together. This is a Weston 10 tray stainless steel Dehydrator Model NO. 74-1001-W (update: Have been using this dehydrator for about three weeks and poof it went out with a puff of smoke. I was going to make some kale chips and turned it on to heat up and it lasted about one minute. Hope the company can resolve my problem. Keep you updated.) The company e-mailed me and said it sounds like the heating element went out. They said they will send one. It will not arrive until late Feb. though. I can wait. I still have my older dehydrater, but after using this one it is hard to go back.
Updated again: Just got a another Weston dehydrator from the company to replace the broken one. Nice. Trying it out right now. Drying some garden Brussel Sprouts. I noticed the heating part working way better that the last machine. So, I geuss it was never working right to begin with. I am excited to see the results of the new machine. Thank you Weston.
Online it said the trays have a chrome finish, but the manual says that they are only stainless steel. Even if they were to have a chrome finish it would not be and issue. Only because you must have at least 10.5% chrome (chromium) as part of the steel for it to be called stainless steel. Chrome needs extreme temperatures to exhaust toxic fumes. So, industrially making stainless still has toxins in the air. That is why much of that process is now mechanical, run by people away from the fumes. I am sure there are still some level of toxic risk working in that environment. Some Stainless steel uses 7% Nickel to and is more flexible. I have read that perhaps it is less toxic to use/process the nickel than the Chromium, But we would have to find different ways to have such strength in metal and or with less pollution. There are other ingredients that have toxic qualities to.

There is 15 square feet of tray space and I bought 4 silicone high heat resistance baking mats to fit the trays. Yes, I may need to by more with a ten tray ability. This will allow me to dry my baked pumpkin/squash in order to then bend it and store in glass jars. Plus the trays square openings are large and items will fall through. I am even considering trying to find stainless steel mesh screens to fit. But I need to find where to get such an item.

This dehydrator is not any louder than my Nesco American harvest was. The fan and heating element are in the back and dehydrate items much more evenly than my old machine. My Weston was half the price of an Excalibur and non-poly=toxic.

I have been using it nonstop since I got it. It has a 12 hour timer. I just crank the timer up whenever I need more time or it is bed time. The front door comes off. I can open it while the machine is on to check food. I have only heated it to 145 so far. The side and top do get hot and I am sure the back with the heating element gets very hot. This machine needs a lot of clearance (more so in the back) and have it be non accessible to people bumping or touching by accident.

If you have a small or large garden. This machine will help you store your harvest and more for a long time in glass jars or other forms of storage as noted at the dehydrate to store site. No hot canning, no freezer to overload. No worry about an electrical outage in the hot summer or cold winter. I learned to dry many items from dehydratetostore.com.

Yes, it is the end of December and I am still processing food. I just finished boiling and then dehydrating the last of my acorn nuts. Blanched and dehydrated some cabbage. I have cabbage, and brussel sprouts just about ready to harvest.  Still harvesting and drying Kale, Kohlrabi, and eating Butter crunch lettuce. I have to cover the 2 greens garden boxes during freeze warnings, but so far everything is still alive and producing.

Spicy Chicken And Spinach Recipe Using Garam Masala

This is a recipe I had read about with vague details somewhere on the Internet. I have made it a few times and have found great variation and best detailed instruction. It is very good and the spice is mild. You have the choice to make it more spicy to.

Had this last night and forgot to take a pic. I was so hungry.

Ingredients:

4-6 pieces skinless chicken, bone in. ( the flavor is so much better in this recipe with bone in) I only use 2-3 pieces of chicken with success using same ingredients.
Vegetable oil
1/2-1 onion chopped (or more or less. what you like best).
1 tsp. Garam Masala spice (look for my recipe in this blog)
1 tsp. ground Ginger or about a one inch chunk diced or shredded fresh Ginger
1 tsp. dried ground Garlic powder
1 tsp. Salt
1 Bell pepper and or 2 Tomatoes diced (a can of diced Tomatoes, or Rotel is a good replacement, If you use the Rotel. The Jalapenos are not needed).
2-4 T. diced Jalepeno' (this extra spice is optional)
About 10 oz. fresh spinach and or other greens like Kale, and Collard greens work to. (I have even used dried kale and dried Kohlrabi leaves with success). More or less depending on how many people you are serving.
Water: just enough to cover the Chicken in the pan.


Put spices into a small cup or bowl. In a large pan or pot, brown Chicken in 1-2 T. oil. Then take out and set aside on plate/bowl and cover. Put Onions into the pan or pot with another 1-2 T. oil. Saute on medium to low for 5-10 minutes. Now add spice and stir. Place the Chicken on top of the spices and Onions.  Add the Vegetables and pour enough water to just cover the chicken. Bring to a boil and then simmer until Chickens juices run clear. I do a timer for 20 minutes during the simmer.

Serve over rice or with NAAN bread, tortillas or rolls of choice.


Tuesday, December 20, 2011

Cranberry Dressing/Dipping Sauce Recipe For Steak and Chicken


I found this recipe at Opra.com site. My husband wanted steak with cranberries and this was so good. This is a dressing for meat or a type of dipping sauce. Not a side dish.
I did change the recipe to my taste and here it is.

Ingredients:
Serves about 3 (double for 6 people)

1 Cup. Cranberries fresh or de-frosted
1/2 Cup diced Onion
1 sliced clove of Garlic
1/2 Cup Brown Sugar ( I am sure any sweet will do)
2 T. Red Wine Vinegar
1 Cup of water
1 tsp. Worcestershire sauce
1 T. Soy Sauce

Put all into a medium pot and bring to a boil. Then reduce heat to a simmer. Let it simmer until reduced to a thicker sauce consistency. Stir it here and there to check the sauce along the way. I estimate about 45 minutes. When the sauce is done. Turn off the heat and re-heat/use when ready.

You can start the sauce, then make the rest of the meal.  This can be made ahead of time and kept in the fridge for up to two weeks. Then re-heat when you want.

I made this for steak sauce and even ate it a few days later re-heated as chicken tender sauce. Very good. A must try.

Saturday, December 17, 2011

Peach And Black Cherry Pie Recipe

Best fruit pie ever. I am not much of a fruit pie eater, because I never found one I loved. This recipe was a total accident. Although I have noticed others online have made Peach and cherry pie with success and love for this combination to. I have created my own version of this fresh delight.

I was looking in my upright freezer and moving things around to add chicken. I threw some recently frozen peaches into an open pie crust. Suddenly I took a second look at the peaches in the pie crust and thought that I should make a peach pie in that crust before it gets stale in the freezer. I placed the crust and peaches on the counter and put the peaches into a glass bowl to thaw. After a while, I noticed that perhaps I did not have enough peaches to fill the whole pie. I had apples and oranges in the fridge. I also had black cherries pitted and frozen. So, I thought that peaches and cherries would be a good combo.

Here is my recipe:

Heat your oven to 375F

Prepare a pie crust and place in a pie plate or use some store bought crust in a tin. Or use store bought crust and put it into a pie plate. What ever works for you.

Mix in a medium to large bowl, about 2 cups fresh or frozen thawed sliced Peaches,
Plus 2 cups fresh or frozen thawed, pitted, cut in half Black Cherries
1 cup sugar (or half sugar and half Splenda)
1 tsp. Almond extract
1 T. Cornstarch
1 tsp. powder Pectin.

Crumb topping:
Mix  in another small to medium bowl, 1/2 cup flour
1/2 cup brown sugar
2-3 T. butter of choice. Mix with fork or pastry cutter.

Take prepared pie crust that is in a pie plate and place it on a cookie sheet to collect over flow of juices during baking and for ease of moving pie into and out of the oven. Now pour the bowl of fruit mixture into the prepared pie crust. Now sprinkle the crumb topping on top of fruit mixture in prepared pie crust. Place prepared pie into the pre-heated oven of 375F. Bake for 1 hour. When it is done, take the pie out of the oven and place on counter to cool for about an hour. You could serve the pie then, but I put my pie in the fridge and ate it cold for breakfast, the morning after.


This was so yummy. A must try for any time of the year.


Mmm....

Wednesday, December 14, 2011

Acorn Pancakes Recipe

Recipe tweaked from Ina Garten Cook book. As you can see in the pic. I got a new nut cracker. My other one broke. It is a seafood/nutcracker. works so much better.

Use:

3/4 cup white flour
1/2 cup whole wheat flour
1/4 cup Acorn meal/flour (or just use more wheat flour if not available)
3 T. sugar
2 tsp. Baking powder
1 1/2 tsp salt
1 1/4 cup of milk, of choice (Kefired milk is good to.)
2 eggs


Mix all dry ingredients first then add the wet. Mix.


Heat a skillet and add a little butter or oil. Splash a sprinkle of water in the pan. If it sizzles the pan is ready to cook. Pour 1/4 cup of mix for each pancake and cook on each side until done. You know when the first side is done when it bubbles.

Plate and serve with your choice of toppings. Enjoy.

Makes about 10 pancakes.

Freeze leftovers in portions for ready meals in the future.

Remember to never defrost or cook your frozen foods or any foods/liquids in plastic.

Monday, December 12, 2011

Hand And Body Butter, Cream, Recipe

I love my lotion bars. My husband not so much. He has been so considerate to start tossing his lotions, so not to have them come into contact with myself. I got him some 92 degree melting point Coconut oil and he likes that. Unfortunately winter came and the Coconut oil became less user friendly in the cold. I noticed others making simple creams and lotions that were easy to make and use non xeno and phyto estrogen products. I searched to find the right recipe for the ingredients I had on hand.

I sort of combined a few recipes and came up with my own take on a thick cream that is xeno and phyto estrogen free.

Cream ingredients:

6 oz. 92 degree melting point Coconut oil
1/2 oz. Virgin/Organic coconut oil (This has a lower melting point, about 76 degrees)
6 oz. Almond oil
1 T. Cornstarch
4 small gel caps of Vitamin E (optional) Use D-alpha tocopheral vitamin E. That is the natural, non synthetic kind. Try not to use DL-alpha tocopheral acetate, that is synthetic and very bad for diabetics.
40 drops of 100 % Grapefruit essential oil (You can use what you like. all Citrus oils are good. The big no no's are Lavender and Tea Tree). Essential oils not only smell good, but have another purpose. They are antiseptic. Update: I have been told mint blocks progesterone. Just FYI. I was also told to not use Patchouli oil. Ug. But do not worry if you are not suffering from an estrogen dominant disease.

A note up front. You can use 6 1/2 ounces of any high melting point butters/oils that are firm and not normally in a liquid state for this recipe. You can also use any of the other  6 oz. of oil that is normally in a liquid state for this to. To be xeno and phyto estrogen free do not use oils of Safflower, Canola, Cotton seed, and Sunflower. There is also concern for Flax and Soy oil to.

How to make this. Take a glass or stainless steel bowl that will fit over one of your pots. Put a few inches of water in that pot. Then place the bowl on top. Bring the water to a boil and then down to simmer. Put the oils/ butters in and let melt. when melted, take the bowl off the pot and place on the counter. Let cool for about 20 minutes.

Now add the Cornstarch, Vitamin E and the essential oil. Take a hand held mixer/blender. (If you do not have one. I highly recommend getting one of these cheap and wonderful gadgets. Between blending hot soups in the pot and making your own body lotions and creams to mixed drinks. It pays for itself quickly). So, take your hand held mixer/blender and mix. I would take breaks because mine was to hot and it took awhile to cool. Blend and possibly take breaks here and there leaving the blender in the bowl until it becomes thick. spoon into containers of choice.

My cream fit perfectly into a 16 ounces glass jar. I put the top on and let it finish firming up now that it was whipped into a nice mayonnaise state.


It firmed up nice. I gave it to my husband and he loved it. I love it to. He said it looked like mayo, but felt like soft butter. Very pleased with my new product. Hope you will be to.

Update: My husband liked this so much he wants me to make it in baches for him every month from now on. Got my oils from http://www.soapdoods.com and essential oils from http://www.SFherb.com and my vitamin E from walmart or you can get it from http://www.walmat.com . I use spring valley. Organic coconut oil from http://www.swansonvitsmins.com/ I will have to buy the liquid vitamin E now that I will be making this more often.


Henna Hair dye recipe

This is my new hair dye. Xeno and phyto estrogen free.

I got this recipe from Hennaforhair.com

100 grams fresh Henna powder (I got mine from SFHerb.com)
500 ml. liquid (17 ounces). Half acidic/lemon juice, bottled works. The other half, use water that has been boiled.
2 grams powder pectin (0.8 oz.) Optional.


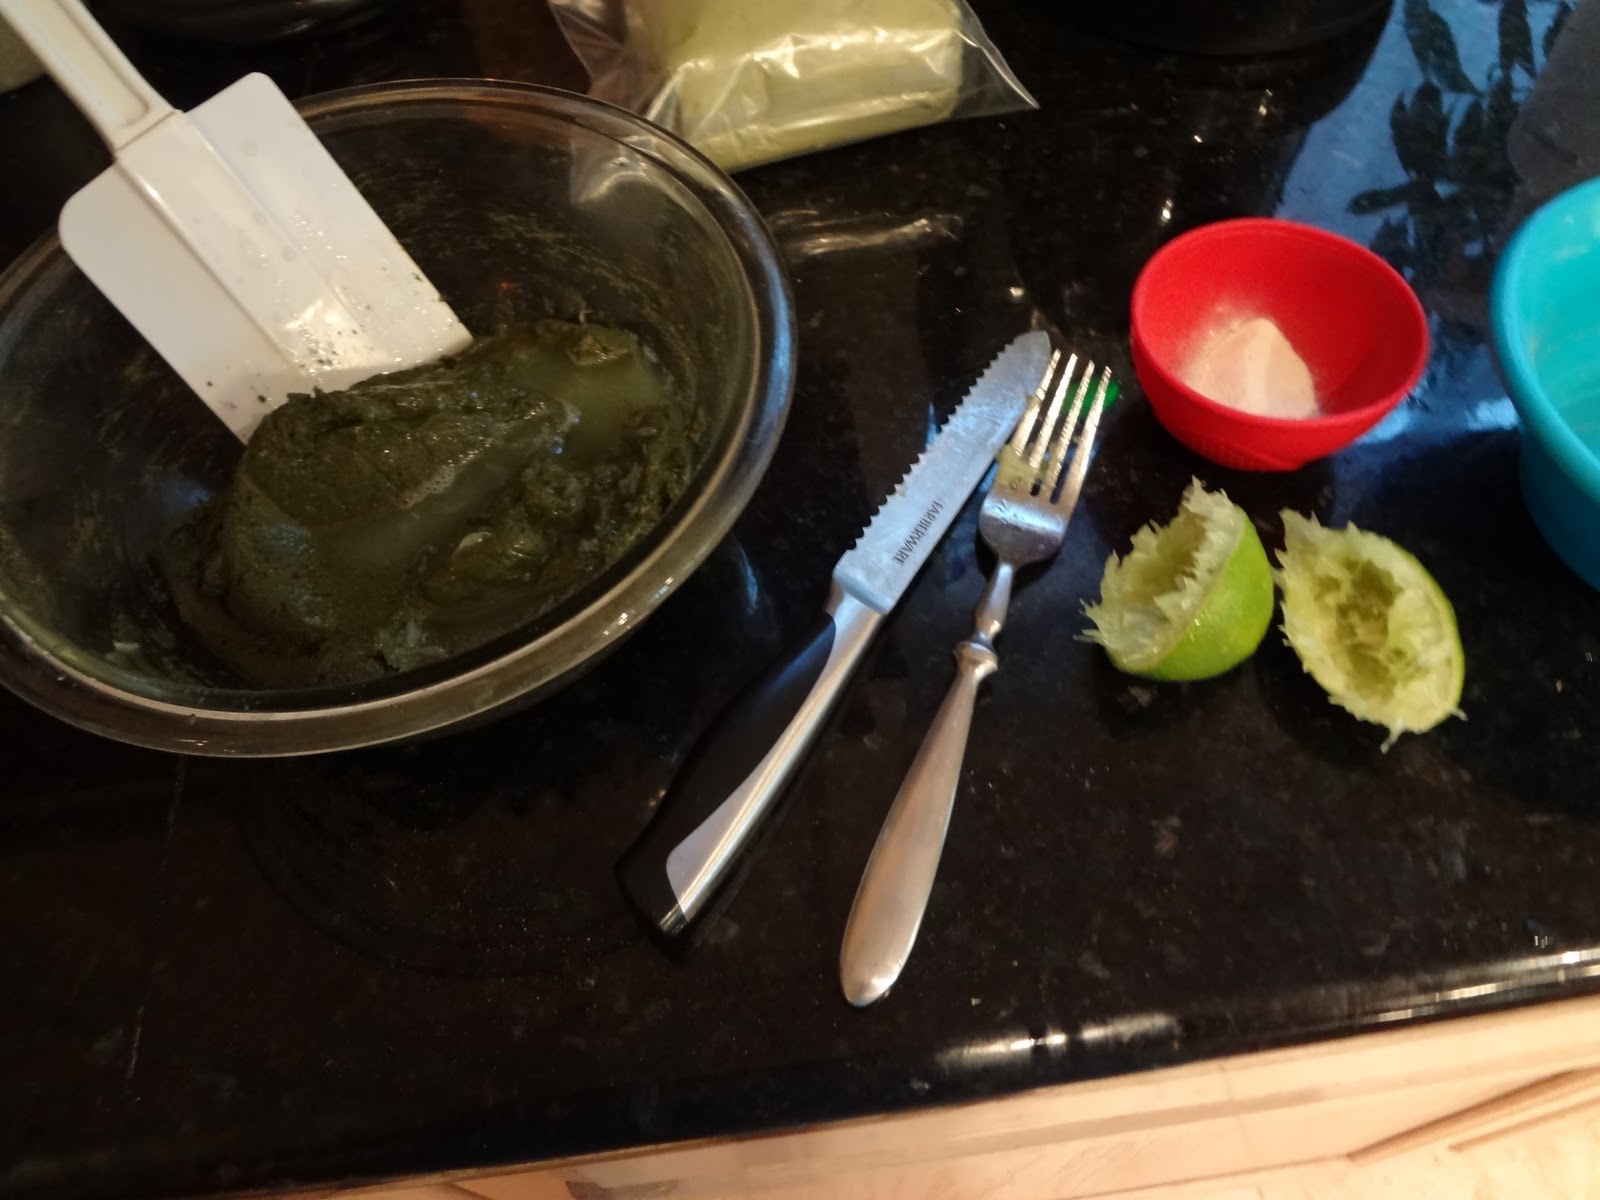
Mix the acidic juice (any citrus juice will work) and Henna powder. Note: The citrus is what helps the Henna bond and last on your hair.

Start adding the boiled water slowly a little at a time. I added 1/4 cup at a time.

 I added juice of a lime since I used bottled lemon. For extra acidity.


Finished mixing all of the boiled water in.

Now add the pectin. Mix in. The pectin helps this goop spread onto and into your hair better.


Now to the bathroom. wear some disposable gloves because it is going to get messy. Please ignore the vitamins and prescription iron pills. ; )


Make soure you wear a towel around you or something that is not new. Or just strip down to your birthday suit or undies. Take a spatula and spread the mixture all over your hair.


I moved this to the bathtub. Very messy.

When done put your hair up high in a bunch. Take off the gloves and throw them away. You want to let this stuff sit in your hair for about 30 minutes. This gives you some time to clean up the bathroom a bit.

My goopy Henna'd hair.

Spatula stained. It will wash out over time. Safe and non toxic Henna.

Now that you are ready to wash this stuff out. Get into a shower or bathtub and rinse as much of it out as you can.You will not be able to get it all out in this rinsing. wait 24 hour to wash your hair. As your hair dries you can brush more of the grainy parts out. So, brush your hair in/over the sink, shower or bathtub. It is more messy, but will clean up easy with wash cloth or vacuum.

I did not notice the Henna conditioning my hair like some say. I can say that it did dye my hair including the grays as a lighter shade. It has lasted almost a month now and I am ready to do this all over again.


Update: I find that since I have many grays and my hair can start to grow faster than I can make time to Henna, I have found a short cut. I have started to spray the front and top of my roots with Sun In. Let it bleach out my greys for a fews days or week, to blend and look a little better. Then when I have the time, I Henna my hair. I think the small amount of Peroxide in the Sun in is harmless and the extra ingredients are not bad enough for my concern of permanent issues. It is cheap and convenient.

In the end. I continue to do crazy things to my hair and stopped using the Sun in. Probably not the non toxic as I was wanting. But on the other hand I have read and tried a new way to rinse out the Henna. When you are ready to rinse the Henna out. Fill a bath tub up with water and get in. Put your hair in the water and swish it around. Then drain the tub and rinse with a large cup or in a shower. you can add conditioner to your hair and leave it in a few minutes and then rinse your hair in the tub or shower. This helps gets the a lot of the granules out.

I have not found adding conditioner right after doing my hair with Henna to cause a problem with color or lasting. I have not had a problem washing my hair to soon either and Yes, You can totaly leave the Henna on your hair for much longer. Like 2-4 hours or more. It is just about the time you have on hand. I have also used 2 year old/from purchased Henna and have it work just fine. Good luck.

Saturday, December 3, 2011

Kava Drink Recipe

Need some stress relief? Feeling a little or a lot of tension from a long day? Some mild pain? Drink Kava.

I buy my Kava form KonaKavaFarms.com  Their Kava powder is a fine ground powder.

Just add 1-3 tsp. of Kava powder into your mug. I use 1 to 1 1/2 tsp.
Now add 1-3 tsp. Cocoa powder or Carob powder.
Add 1 T. of sweetener of choice. I use Splenda
Add 2 T. dry non dairy creamer or milk powder with hot/boiled water. (You can add hot milk of choice with or instead).

Mix and drink.

This drink is and anti-depressant and will help you sleep well with vivid dreams. This drink de-stresses and relaxes your mind to help loosen those tense muscles. Look up Kona kava farms for more information. Do not drink Kava if you are under 18, pregnant or lactating. Do not drink Kava if you have a history of anxiety attacks while on anti-depressants. I have given people Kava whom were taking anti-depressants with no history of anxiety attacks while on anti-depressants, with success.

I have also used this drink to stop excessive cramping in my uterus during that time of the month. Or when my Ibuprofen has not kicked in yet or just have pain in general and do not want to take the Ibuprofen. It works as a pain killer. I am not sure to what extent. You will have to try for yourself. Kava is also recommend for drug addicts in recovery. One would have to want to take Kava to begin with. I do not know for sure, how well it works for addicts. Kava can be bought in pill form to. Remember, "That one cannot help others that do not want to help themselves". For me it is one of those hard lessons learned dealing with people close to me.

If you have a better source, cool. I love this source because of the fine ground powder, quality, service and shipping to go anywhere else.


                                       Hope you have a happy day....

Garam Masala (mixed spice) Recipe


This is an awesome mix. I use it for many recipes. Just look online for recipe's using Garam Masala. This mix is hot and spicy and will clear out your sinuses. In a good way. Yum, Yum.

The spice mix:

1/3 cup ground Coriander
1/4 cup ground Cumin
1/4 cup red pepper flakes
1 1/2 tsp. ground Turmeric
1 1/2 tsp. ground Ginger
1/2 tsp. ground black pepper
1/2 tsp. ground Cardamon
1/4 tsp. ground Cloves
1/2 tsp. Cinnamon

Mix all together in bowl and put into a glass jar with lid. Keep in dry dark place.

Look up my recipe for easy beef or chicken or veggie curry recipe on my blog. I hope to put more easy Graham Marsala recipe's in the near future.

Sunday, November 27, 2011

Dehydrating Cantaloupe

I do a lot and take pictures along the way. So, when I am ready to blog it. The picture helps me retell my mini adventure and or random event in life.

This blog is about dehydrating my Heirloom Muskmelon (cantaloupe). I bought the seeds much to late in the summer, but tried to grow them anyway. Only two plants lived and produced a very small crop which was enough for me. I made some Aqua de melon and dried the rest. My luck in growing late melon is that there was a bad crop of cantaloupe on the market temporarily, before people started getting sick and some dying.


Back to our directive. Dehydrating melons/cantaloupe. Make sure they are at their peak of ripeness and if possible from your garden. Everything is better when you grow it yourself. I sliced mine about 1/4-12 inch thick. You do not want them to thin, because they are mostly water and will become to fragile and paper like. Not so tasty/ or good. Placed them on my dehydrator racks.


Now dehydrate at 135-145 until dry. Remember all dehydrators are different and drying times will vary according to that and humidity in the air.

When dry store in a glass jar with lid. I have no idea how long these will stay fresh. I am going to estimate 6-12 months and cross my fingers. These are good to just snack on or add to soup broken up. I have enjoyed these dipped in tahini/sesame paste. Surprisingly good. Sprinkle broken pieces on salad. Perhaps with a sesame dressing. Hmmm..?

Saturday, November 26, 2011

Saucy Egg on Tortilla (Huevos Rancheros) Recipe

I love eggs.

This recipe, I make for just me. It came from the "Mexican cooking made easy" book by; Diane Soliz-Martese. I did change it a little with shortcut options.

I used to make this for me and my oldest daughter, but she no longer resides with me.

You need:

Ranchero Sauce

Cook 2 cups chopped Tomatoes and 1/4 cup of water until softened.
 (You can also use a 15 oz. can of Tomato sauce or diced tomatoes for a shortcut.)
Mash tomatoes, add about 1 T. chopped onions (or 1 tsp. dry), pinch of salt and 1/4 tsp. Cumin. Stir and serve warm. This serves about 2-4, but I would double it if you like a lot of sauce like myself. This is good on tamales, enchiladas and eggs.

Take out 1-4 tortillas. (Corn or flour work fine. Use what you like)
A few T. of cooking oil
1-4 eggs depending on how many you are feeding and your appetite. I eat just one, but two would work for hungry peeps.
shredded cheese (optional)
fresh cilantro (optional)

Heat about 2 T. of oil in skillet over medium heat. Warm each tortilla in the skillet for about 15 seconds on each side until soft, drain. Fry eggs, yolk side up, in butter/or oil of choice. You may salt and or pepper your egg while frying. Pour 1/4-1/3 cup of warm sauce on each plate, place tortilla in sauce and an egg on each tortilla. Spoon more sauce on eggs and sprinkle with optional cheese and or fresh cilantro.

Can serve with beans and or fresh fruit. You know my choice of fruit would be some orange. Growing up in Orange County Ca. where you were literally surrounded by orange tree groves, (once upon a time) sliced oranges were served at most eateries as part of a meal. A must for any breakfast served with fresh squeezed orange juice.


Wednesday, November 16, 2011

Lotion bar recipe

This simple recipe for lotion bars is all over the Internet. Yet, they sell them online for such a high price. Now that I am using non-xeno and phyto estrogen products. This is my perfect non messy lotion replacement.

You use:

1 oz. beeswax
1 oz. non phyto-estrogen oil ( I used almond)
1 oz. hard oil like Shea, Avocado ect. ( I am cheap and used 92 melt point coconut oil, it is hydrogenated, but I am not eating it and holds well in the heat.)
High heat silicone molds that are 4 oz. or say hold 1/2 cup. (I used 1/2 cup high heat silicone pinch cups I found at Walmart in the kitchen utensil area) Think out of the box if you need to.

If you want a softer bar for like; massage, winter months or preference. Just use 1 oz. beeswax and 2 oz. oil of choice.

 Today I made some bars with virgin coconut oil with a melt point of 76 because my husband wanted a softer bar. Lets face it, he may not like this one or all oil and wax. These bars are not for everyone. My hubby has soft skin from growing up in a climate that has hard winters. Unlike me whom grew up in Southern California with a pool in the backyard and beach 30-45  minutes (depending on traffic) away. Seldom used sunscreen unless at the beach. At the age of almost 43 my skin is freckled, dry, and lets just say, "loosing it's luster." I cannot say that I would trade all my fun in the sun for more youth,  and or beauty.

How to make this lotion bar.

Take a large pot and add a few inches of water. Place that on the stove top and put a glass or stainless steel bowl on top. Heat the water on medium to a boil then reduce heat to a simmer. (Double boiler style) Add beeswax and let melt. Then add other ingredients one at a time. Letting each melt in first. Mix with wood utensil.

Now have your mold ready and maybe sitting on a plate or cookie sheet. Using an oven mitt or like, take the bowl off of pot and carefully, and without getting water in the molds, pour the hot liquid mixture evenly into the mold or molds. After setting empty bowl aside. You can just let the lotion bars set up on the counter. If it is a really hot day or you are in a hurry then you can put the mold or molds in the fridge to set. When they are ready, un-mold them by turning them upside down and while hold the sides of mold, push on the top of bottom until the bar slides out.
I keep mine in a large unsealed, tea bag. Then keep that in a ziplock.

I got my oils from soapgoods.com But their are many other great places to get ingredients. I got my beeswax from Ebay. Straight from bee farmers. It smells just like honey. Yum. Good luck and have fun.

Tuesday, November 15, 2011

Easy Chocolate Rice Crispies Recipe


These treats are easy and so yummy. It has been a holiday sweet I have made in my house for years.

Get a big bowl and put 10 cups of Rice Crispies in it and have a utensil ready to mix.

Now get a pot and fill it with a few inches of water and place a glass or stainless steel bowl on top. Bring water to a boil on medium then lower to a simmer. Weigh out 1 1/2 lbs (24 oz.) Ghirardelli melting chocolate or other good melting chocolate.


Put the 1 1/2 lbs chocolate into the double boiler bowl to melt. Use a wooden utensil to stir occasionaly.


The pot and bowl are hot so keep an oven mitt on hand. Take one large and one medium cookie sheet out and line with wax paper. When the chocolate is melted turn off the heat, take an oven mitt and pull out the bowl from water bath. It may be a good idea to have a hand towel in the other hand to hold the bottom of the wet hot bowl with your other hand, while you other hand with the oven mitt has a grip of the side of the bowl. Do not want any spills, brakes or burns. Besides losing precious chocolate.

You can rest your chocolate bowl (for a moment if you need to) next to the bowl of Rice Crispies. Grab the wood utensil used to stir the chocolate during the melting process, pick up that bowl of hot chocolate, with oven mitt and pour it into the big bowl of Rice Crispies. Scrape as much chocolate as you can, into the cereal. Set aside your bowl of scraped chocolate and wood utensil. Take another utensil and stir the melted chocolate and Rice Crispies until they are all mixed together.

Pour onto the prepared cookie sheets with wax paper. Spread with utensil. You can let this set on the counter or put it in the fridge for about 15-20 minutes to set, firm up, solidify.


When they are set you can just break them up into chunks and pieces. Stick them in ziplock bags and they are ready. My family loves these. they are so good. One big Rice Crispies box at the grocery store will give you 2 batches worth of these nummy tweets. Hee...

Do not forget to lick the chocolate spoon and bowl or have a helper to do it for you.


Have a great holiday.